On-Site Messaging
On-Site Messaging enables merchants to optimize the adoption of the Pay by Bank product by making available a set of custom elements using an easy to integrate JavaScript library. This documentation will provide all the information and tutorials needed for the integration.
Unlock the Power of On-Site Messaging
On-Site messaging is a dynamic feature that empowers merchants to deliver customized content and messages directly on their platforms. After seamless integration with the Pay by Bank product, On-Site Messaging becomes a valuable tool to boost traffic to the payment method, effectively conveying its value and educating your customers.
Key Highlights of On-Site Messaging
- Tailored to Your Audience: On-Site messaging is tailor-made to resonate with your unique customer base.
- Always Up-to-Date: It stays compliant with the latest product specifications.
- Efficiency Matters: On-Site messaging is designed to provide these benefits without causing any page latency.
Why it Matters
On-Site Messaging is not just a feature; it’s a strategic move to enhance your Pay by Bank integration. Here’s why it’s crucial.
Driving Consumer Adoption: On-Site Messaging empowers merchants to boost the adoption of the payment method. By increasing consumer awareness and acting as a vehicle to offer incentives, it effectively drives customer engagement.
Real-Time Optimization: The dynamic nature of On-Site Messaging means you can always showcase the latest messaging and materials. This keeps your conversion rates high and your profitability optimized.
The Importance of Awareness: In the context of Link Money’s innovative payment method, customer awareness is paramount. With traditional payment methods like cards dominating the landscape, making customers aware of the Pay by Bank product is the first step.
Incentives Matter: Incentives and product characteristics significantly influence product adoption. On-Site Messaging provides the perfect platform to highlight these incentives and showcase product benefits.
How it Works
On-Site Messaging is enabled by attaching a script to any HTML page. The script tag can go in the head or body.
Link Money uses current JavaScript best practices combined with custom HTML tags. This ensures that On-Site Messaging will deliver a smooth customer experience and will never hinder your pages from rendering.
<html>
<head>
	<script async src="https://static.link.money/messaging/js/v1/messaging.js">
</head>
</body>
In doing so you will be able to surface a range of custom elements across different use cases.
<body>
	<link-money-banner publish-key="my-publish-key" />
</body>
Strategic Placements
On-Site Messaging should be surfaced at key impact points throughout the user journey, the recommended placements are shown below.
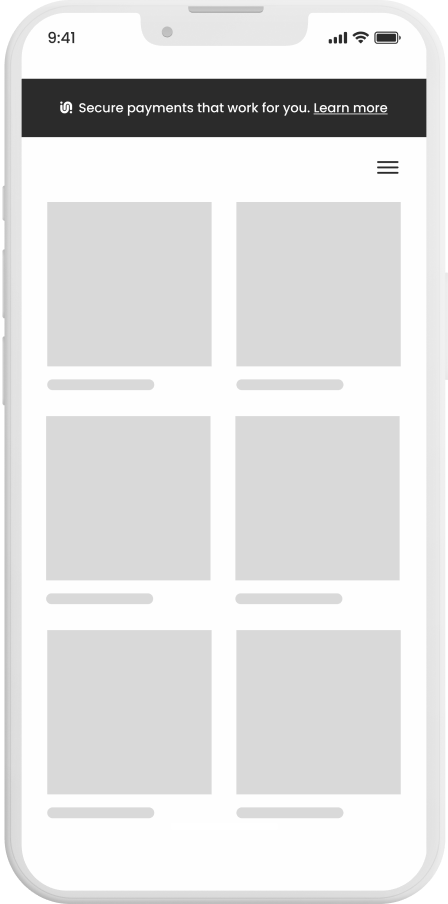

Fundamental On-Site Messaging Placement
To make the most of On-Site Messaging, consider these key placement opportunities.
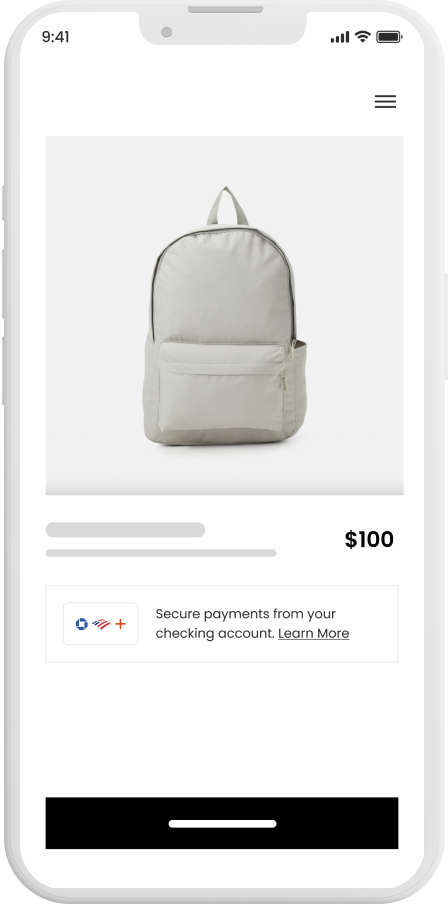
1. Checkout
Leverage Link Money’s checkout-specific elements, which are continually tested and updated to optimize conversion at a merchant-specific level. These elements streamline the payment process, making it easier for customers to complete transactions.
2. Product Page
Display Pay by Bank elements on your product pages. This early placement in the customer journey raises Pay by Bank awareness and can effectively target specific product segments, especially high ticket items.
3. Shopping Cart
Position Link Money elements within the cart section, ideally under the total price. This strategic placement is an excellent point to communicate Pay by Bank incentives, encouraging customers to choose this payment option.
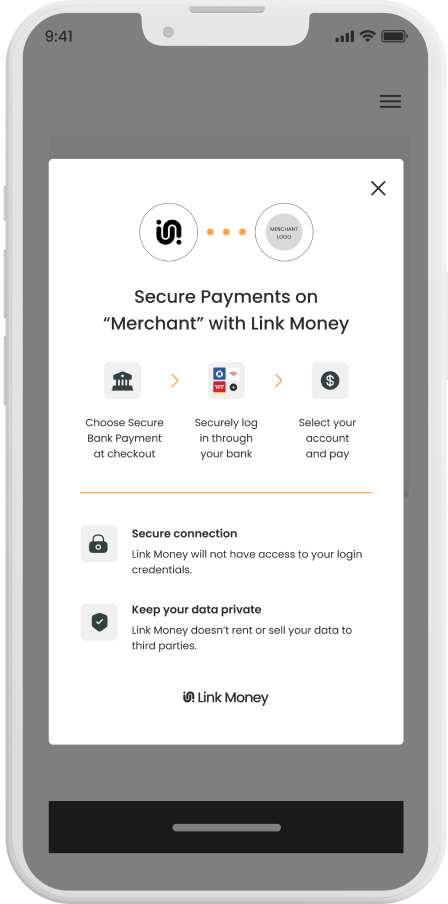
4. Modals & Branding
All Link Money messaging elements include a link to a modal. This modal allows customers to access tailored messaging about the product and up-to-date compliance information via a popup, all while staying on the merchant's page. This ensures customers have the necessary information at their fingertips without navigating away.
Implementation
After following these steps, you will have successfully integrated with Link Money’s On-Site Messaging product! You will need access to the merchant portal to retrieve merchant specific data.
1. Navigate to the On-Site Messaging page in the Merchant Portal
The On-Site Messaging product provides each merchant with two unique Publish Keys that enable two different sets of elements. These can be found by toggling between the “Preview” and “Production” views on the upper right hand side of the page. The publish key surfaced in “Preview” is intended for use in your lower environments and the one surfaced in the “Production” view is intended for use in production.
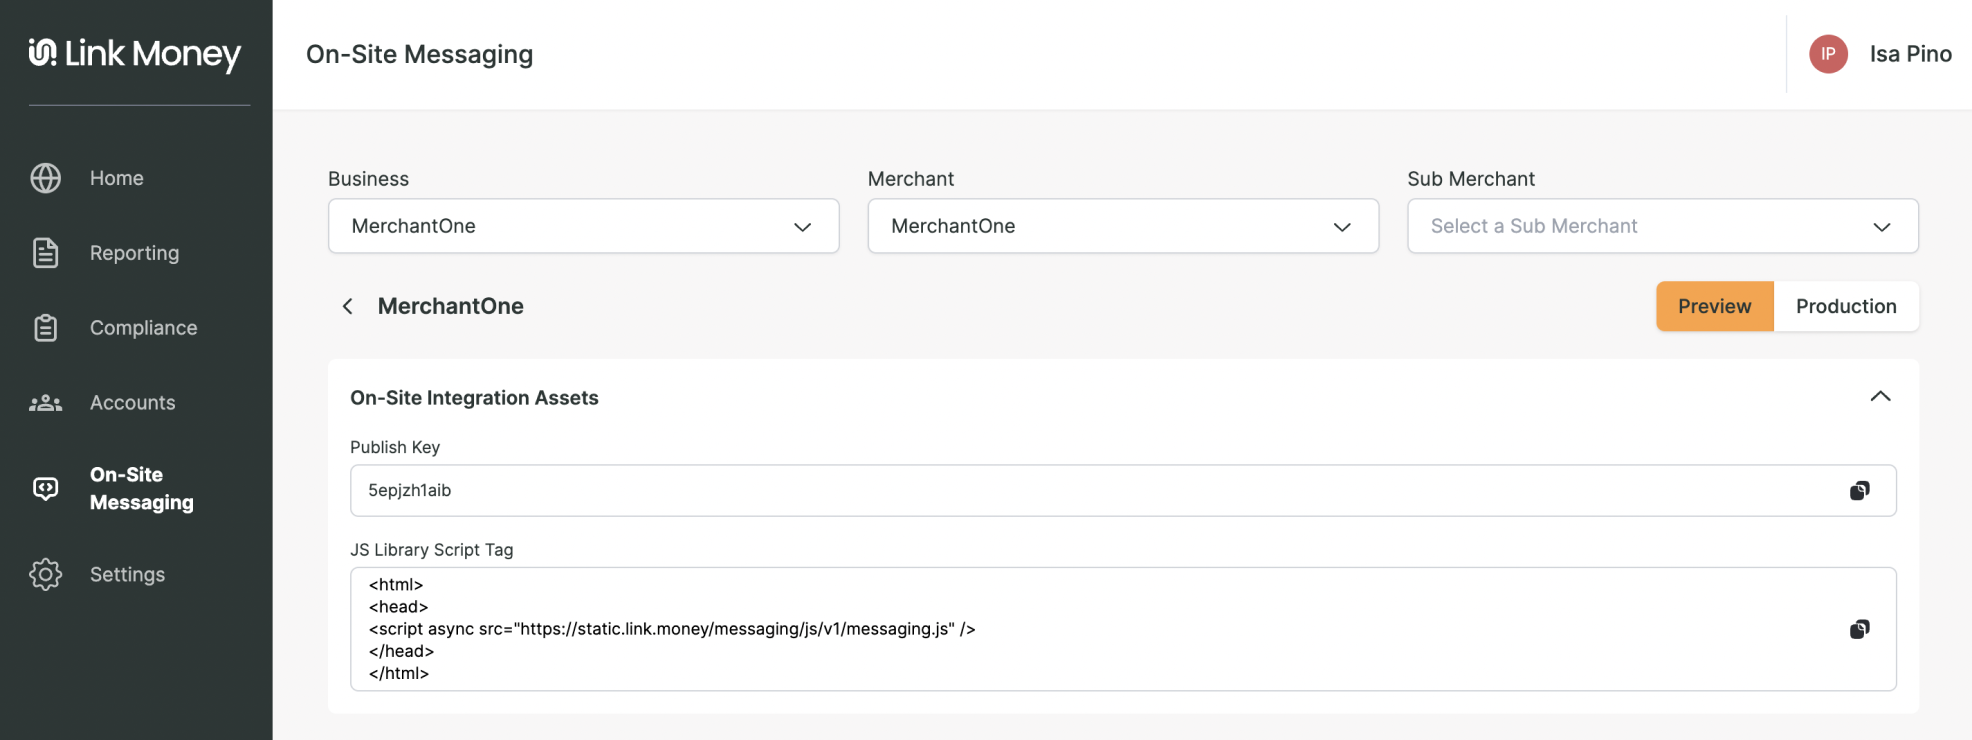
2. Paste the On-Site Messaging Script Tag on your HTML Page
To begin, paste the On-Site Messaging Script Tag in the page where you intend to display On-Site Messaging. The same can be copied directly from the merchant portal.
<html>
<head>
	<script async src="https://static.link.money/messaging/js/v1/messaging.js">
</head>
</body>
3. Select the Elements to Surface on your Page
Link Money offers a range of composable elements that can be displayed across the different stages of the customer’s journey on your site. Work with the Link Money team to select the material best suited for your use case. The elements surfaced on the merchant portal are the same elements that will be surfaced with your publish keys.
4. Surfacing Elements on your Page
Once you've determined what elements you intend to surface on your page, paste the element specific tags in containers on your site. Element specific tags are provided below and on the merchant portal; use the toggle “Show HTML” in the merchant portal to procure element tags with the appropriate publish key pre-populated. For information on preferred placement read below.

5. Customizing Elements & Approving for Production
The On-Site Messaging product provides merchants the ability to match the preview elements and the production elements with the click of a button. This allows merchants to test changes to elements in lower environments and if those changes are satisfactory then the merchant can control when to replicate those changes in production. The “Approve for production” button will be provided for each element in the “Preview” View. To make changes to the text or asset that a particular element surfaces, work directly with the Link Money team to explore additional options.

Messaging Elements & Placement
This section will cover the element formats available and intended placement.
Checkout
Checkout Badge
- This element will surface the badge intended for checkout use. Dimensions are configured by Link Money.
- Place the element in the checkout wherever the customer will select their preferred payment method.
<body>
	<link-money-checkout-badge publish-key="my-publish-key" />
</body>
Product Name at Checkout
- This element will surface the product name intended for checkout use. Text content configured by Link Money.
- Place this element in the checkout wherever the “Pay by Bank” product will be named.
<body>
	<link-money-paybybank-text publish-key="my-publish-key" />
</body>
Educational Text at Checkout
- This element will surface educational/promotional text that contains a clickable link that will surface the modal. Text and linked connection to modal configured by Link Money.
- Place the element in the checkout wherever the customer will select their preferred payment method alongside the Text.
<body>
	<link-money-cta-text publish-key="my-publish-key" />
</body>
Product Page
Product Banner
- This element will surface a banner with educational/promotional text that contains a clickable link that will show the modal.
- Place the banner in the product page’s header so that it stretches across the top.
<body>
	<link-money-banner publish-key="my-publish-key" />
</body>
Shopping Cart
CTA Banner
- This element will surface a card that includes a branded pill as well as text that contains a clickable link that will surface the modal.
- Place the element below the total value of the cart.
<body>
	<link-money-cta publish-key="my-publish-key" />
</body>
Modals & Branding
Linking Modal to Merchant Tooltips
Pay by Bank Modal
- This element will surface a modal, it enables merchants to assign the modal to merchant specific assets. The content and format of the modal is configured by Link Money.
- Place this element next to a merchant specific asset wherever pay by bank is mentioned and not accompanied by CTA text.
<button
 onclick="function openModal(){
 linkMoney.openLinkModal('my-publish-key')
 };openModal()"
>Open Modal</button>
Branding Across Merchant Page
Branding Badge
- This element will surface a badge that enables merchants to display the Link Money Pay by Bank branding across their site.
- Place this element wherever payment methods are displayed outside of the checkout, typically in the footer.
<body>
	<link-money-paybybank-badge publish-key="my-publish-key" />
</body>
Summary
To surface the assets and messaging, copy the provided HTML tags into “containers” across your page wherever you intend for the material to be surfaced. Paste your unique publish key with each of these tags. Use placement best practices of each asset to inform the placement choice on your page.
CSS Customization & Element Formatting
In order to ensure that On-Site Messaging fits seamlessly into your UI, each element is associated with a specific class name. This will allow you to reference those elements within your style sheets to update and format accordingly. Work with the Link Money team to ensure formatting changes match branding specifications.