Shopify On-Site Messaging App
Getting Started
Link Money On-Site Messaging is available in the Shopify App Store as a theme app extension and is compatible with Online Store themes 2.0 or later. With this app, merchants can help bring more visibility to pay-by-bank at their checkout by enabling ads across their website promoting pay-by-bank as a preferred payment method.
Installation
To install our app, go to the Shopify App Store and search for Link Money On-Site Messaging. Once on the app page click on the “Add App” button on the top of the page. You will then be asked to sign into your store. Once signed in, you will arrive at a page where Link Money will request permissions from your store to enable displaying the different ads. Review the permissions requested and click on “Install” once ready. After clicking install, you will be redirected back to your store admin and land on the Link Money On-Site Messaging Home Page. To keep this page easily accessible from your store admin make sure to pin the app by clicking on one of the following buttons.
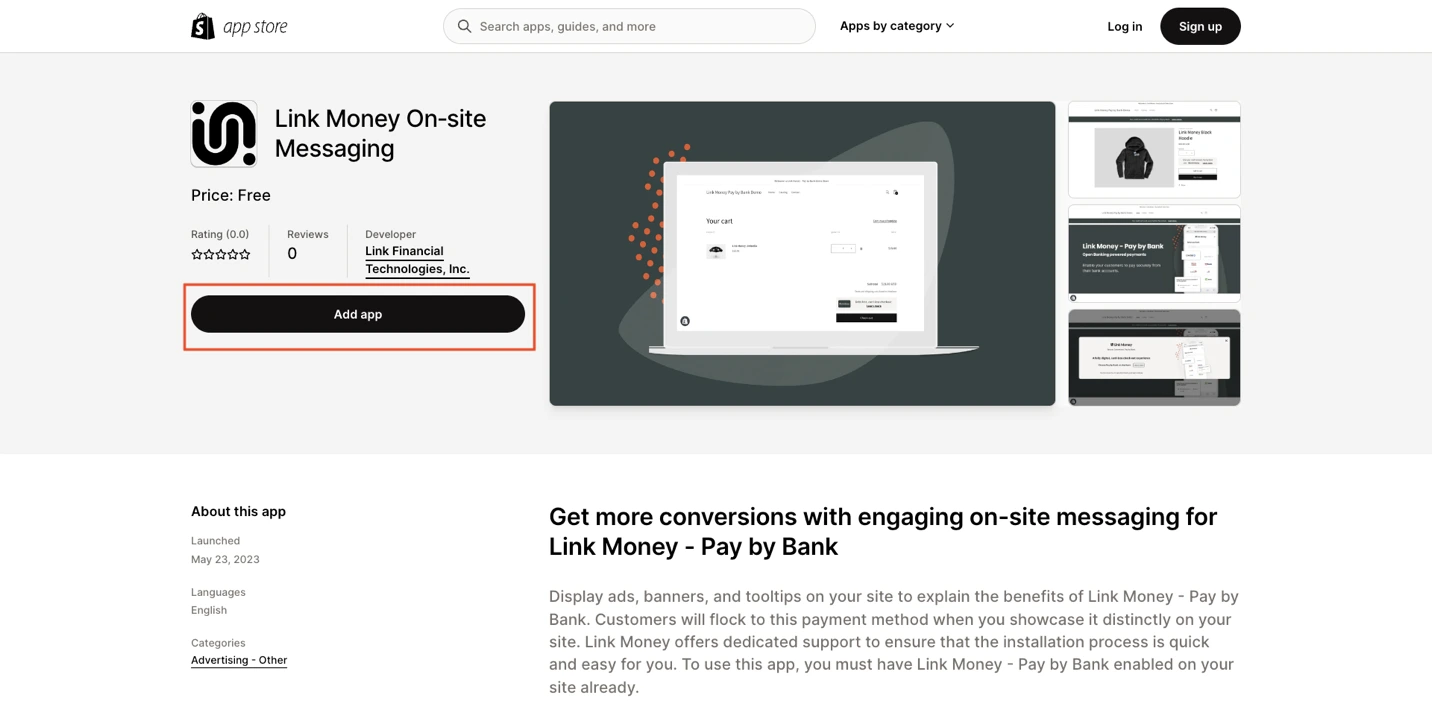
Shopify App Store page
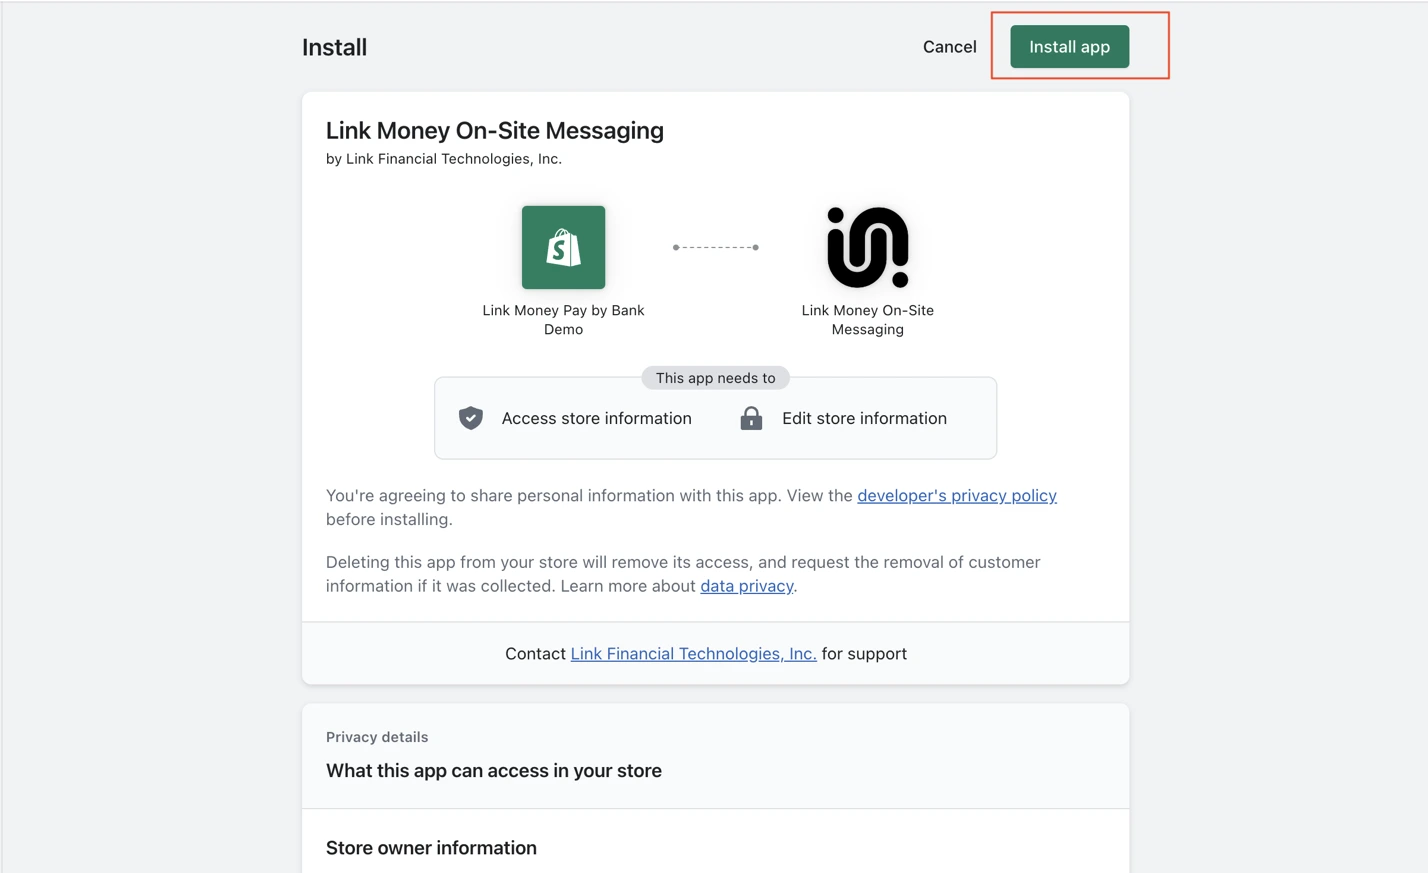
Permissions requested page
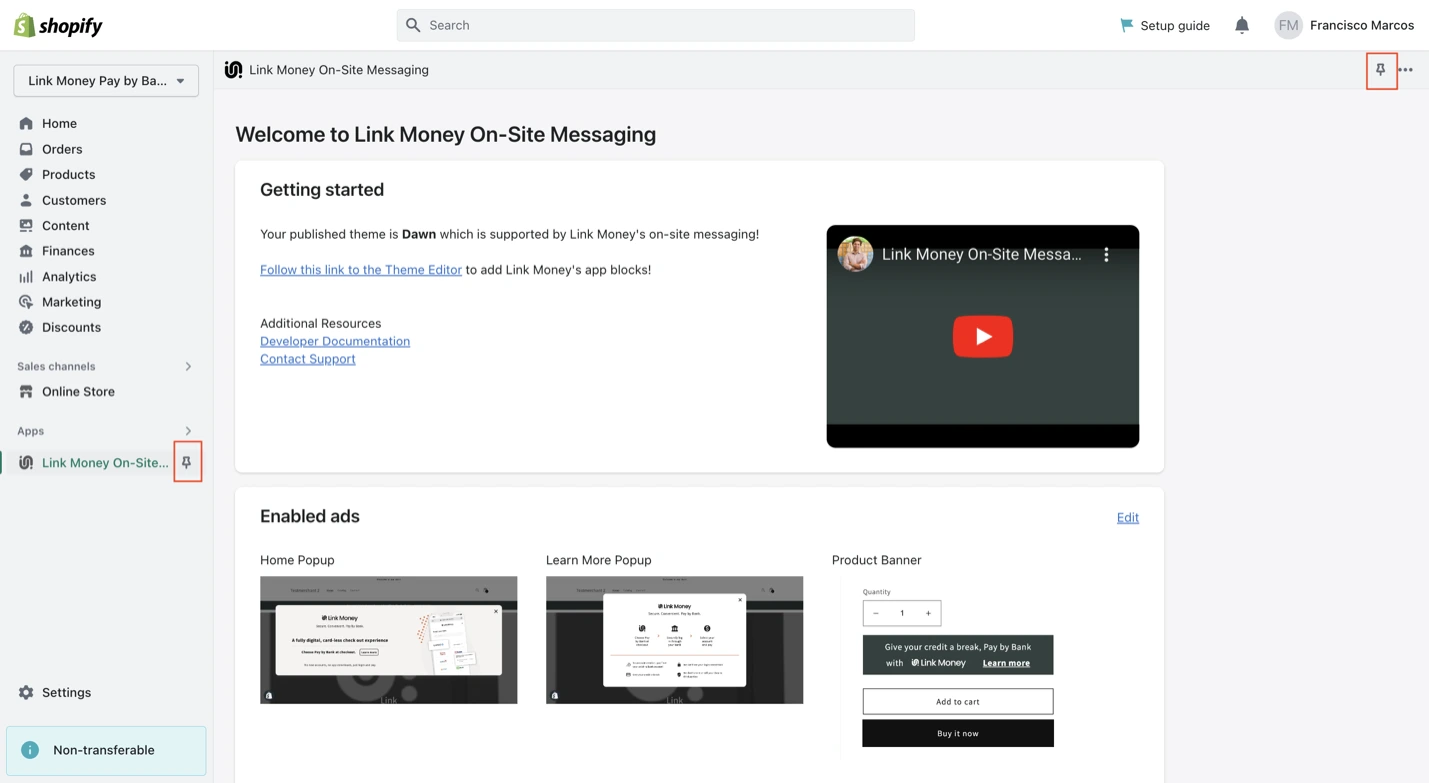
Pinning the app in your admin
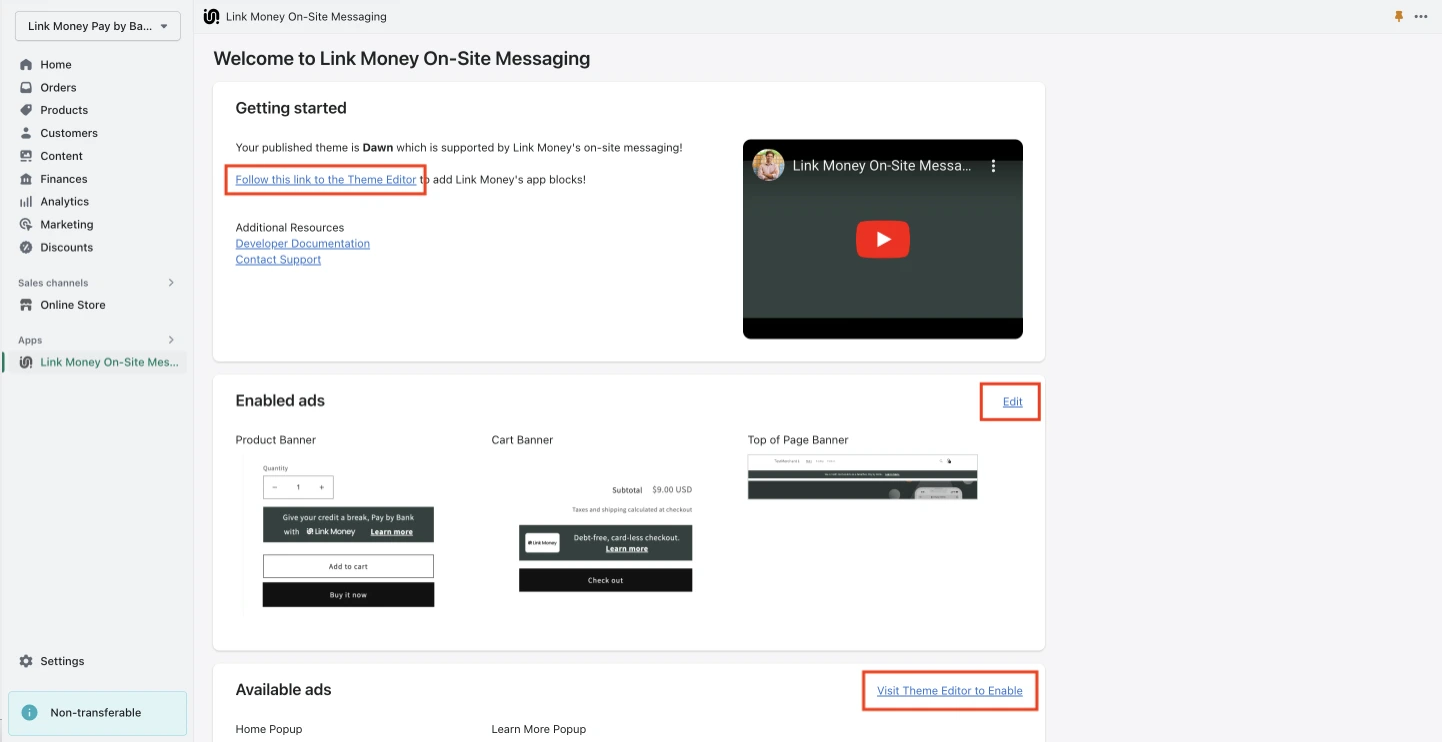
Home Page
The Home Page consists of 3 sections:
- Getting Started
- Enabled Ads
- Available Ads
The Getting Started section at the top of the page provides the necessary resources to make sure your store is ready to get up and running with Link Money On-Site Messaging. In this section you can find a check on your store’s current theme to make sure it is compatible with Link Money On-Site Messaging. Also included are developer documentation, tutorials, and the ability to contact support.
The Enabled Ads and Available Ads display which ads are currently enabled on your store, and what other ads are offered by the app that are currently not in use.
Enabling Ads on Your Store
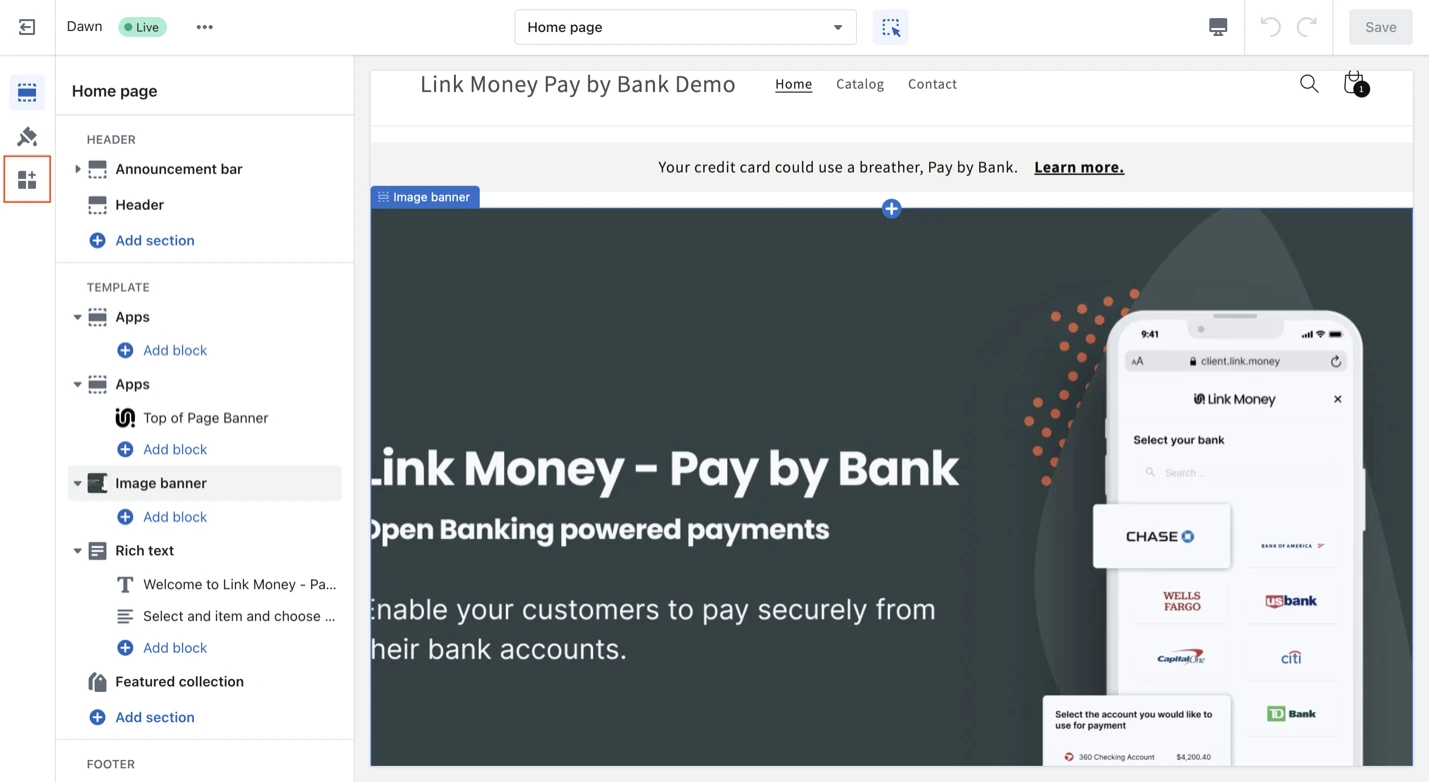
Two different ad types exist within the Shopify ecosystem: App Embed Blocks and App Blocks. App Embed Blocks consist of floating or overlaid elements (such as a learn more popup). App Blocks are components interspersed with your store’s current UI (such as a banner on your home page).
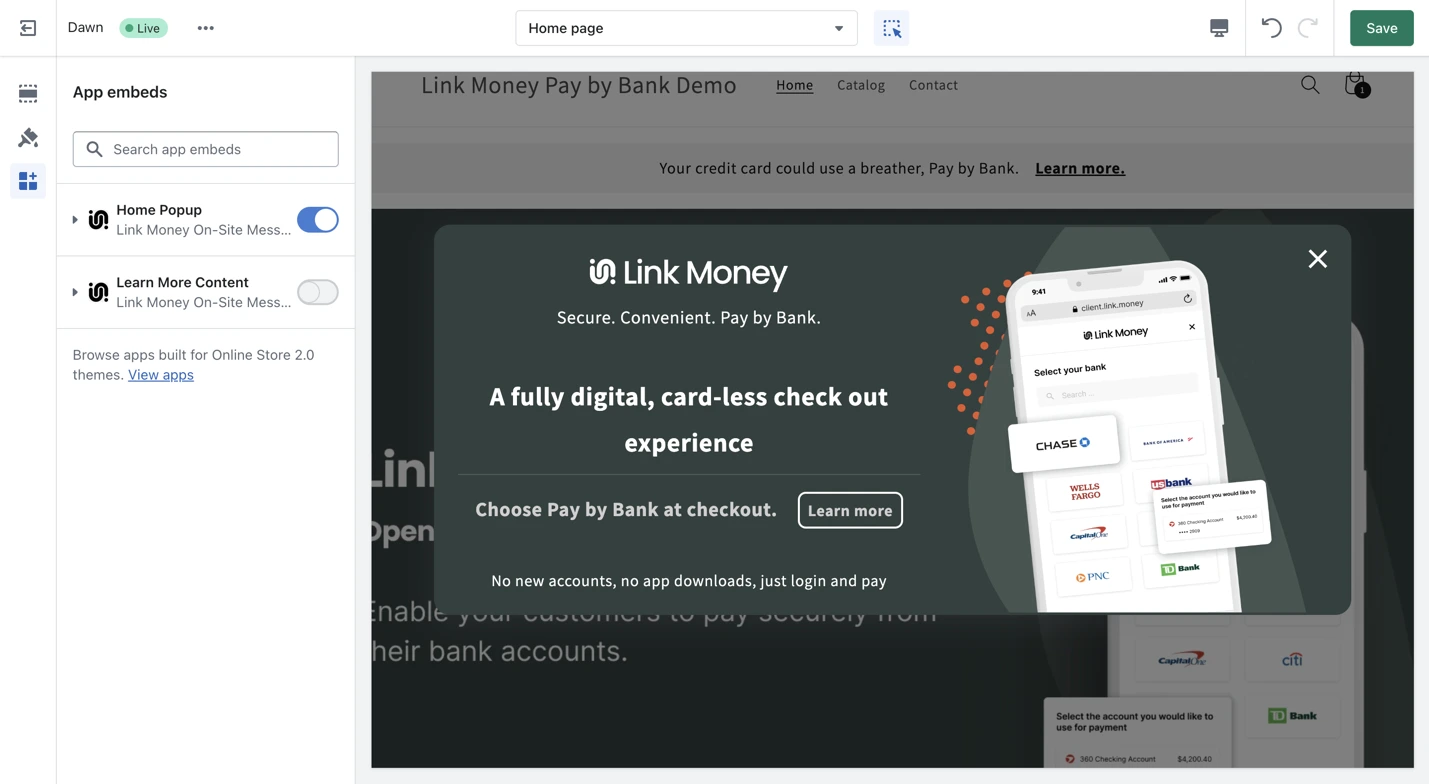
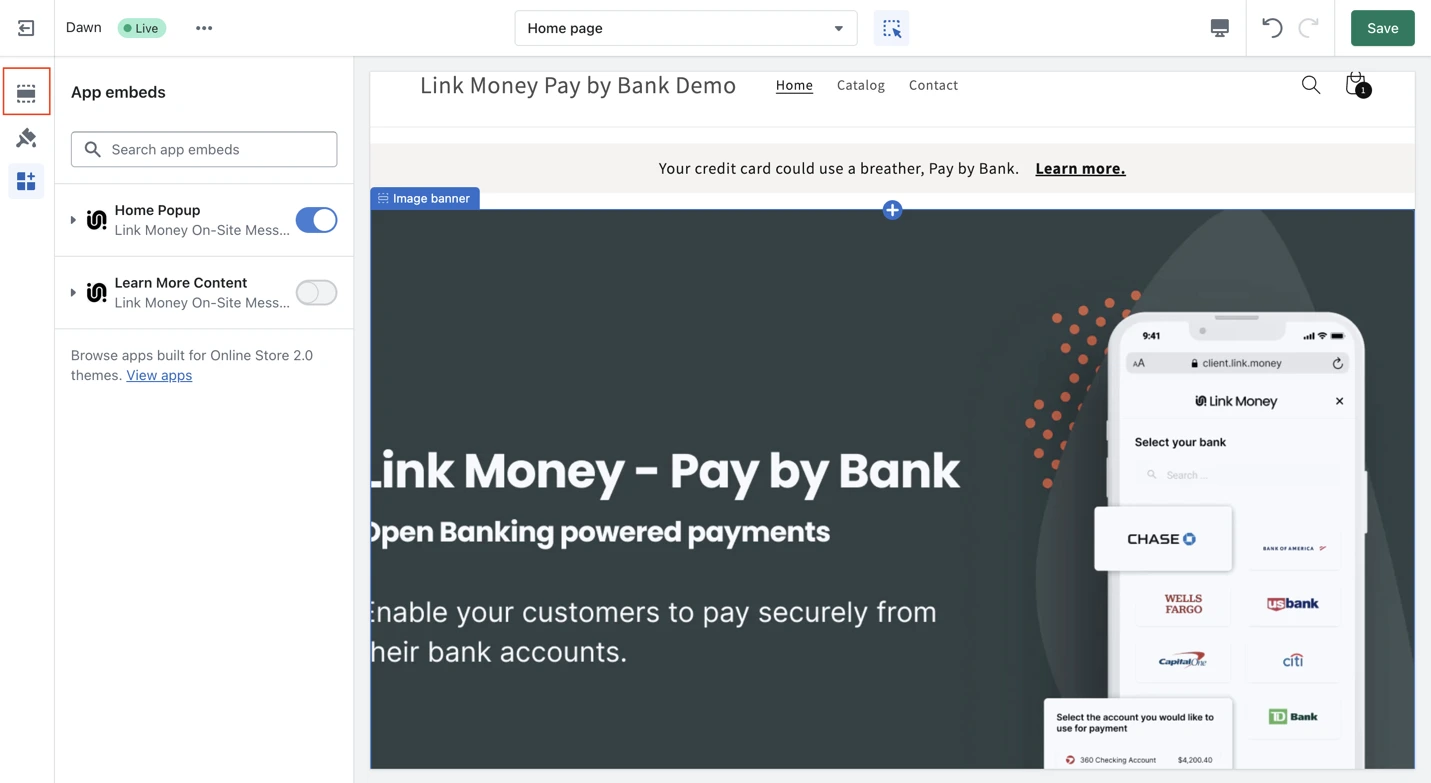
Enabling App Embed Blocks
1. Click on the “Visit Theme Editor to Enable”, “Follow this link to the Theme Editor”, or “Edit” buttons shown below.
2. Once clicked, you will be redirected to the theme editor. Make sure to select the app embed section on the nav bar. Once there you will see the different App Embed options on the inner nav bar with an on-off switch. To enable these blocks, click on the switch for the App Embed Block you would like to enable.
App embed section on nav bar

Turning on an app embed
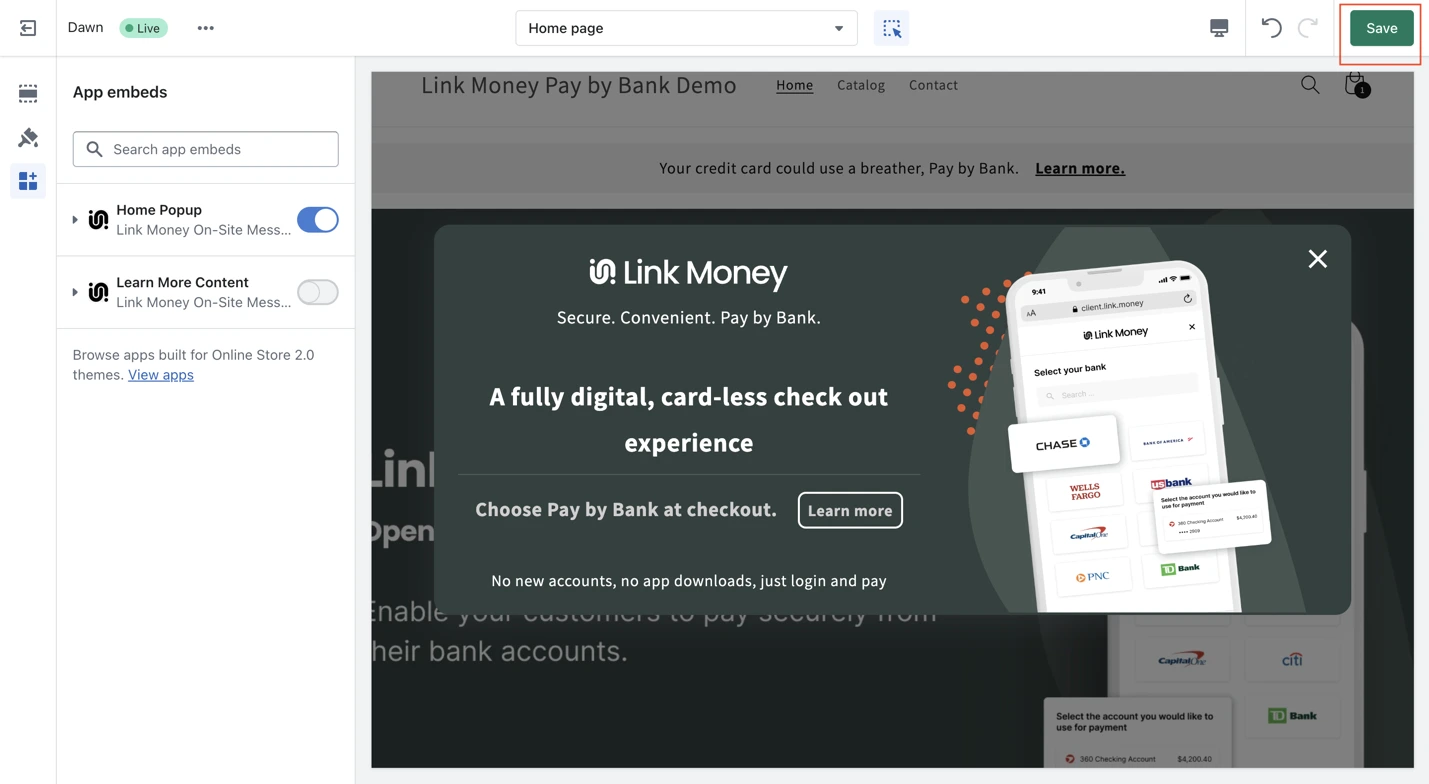
3. You will now see the enabled banner in the preview.
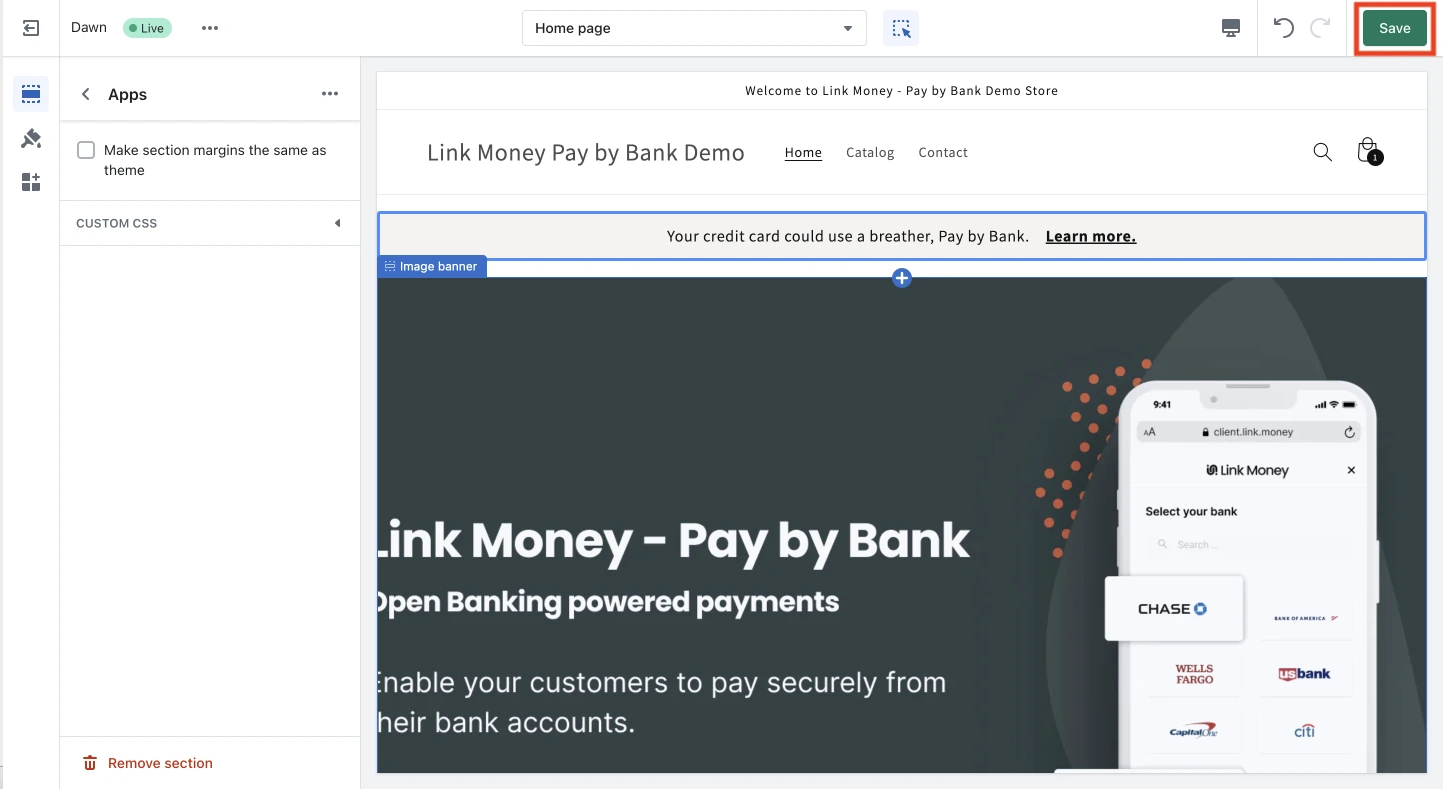
4. Review, and once ready click “Save” to enable the selected block on your store.
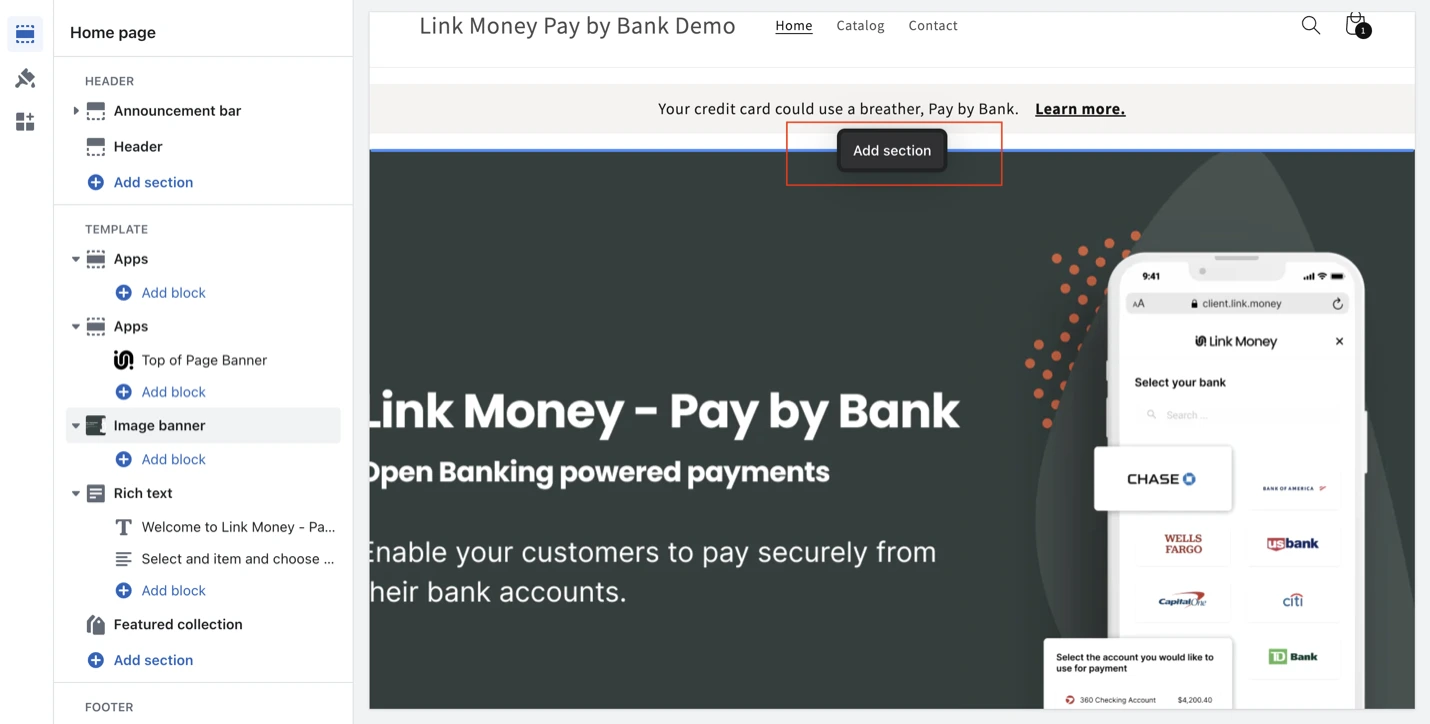
Enabling App Blocks
1. To enable app blocks click on the “Visit Theme Editor to Enable” button. Once clicked you will be redirected to the theme editor.

2. Once at the theme editor, click on the sections tab located on the nav bar.
3. Then go to the desired page of your store where you would like to show an ad and hover over the area. You will see a prompt to “add section”. Click on it.
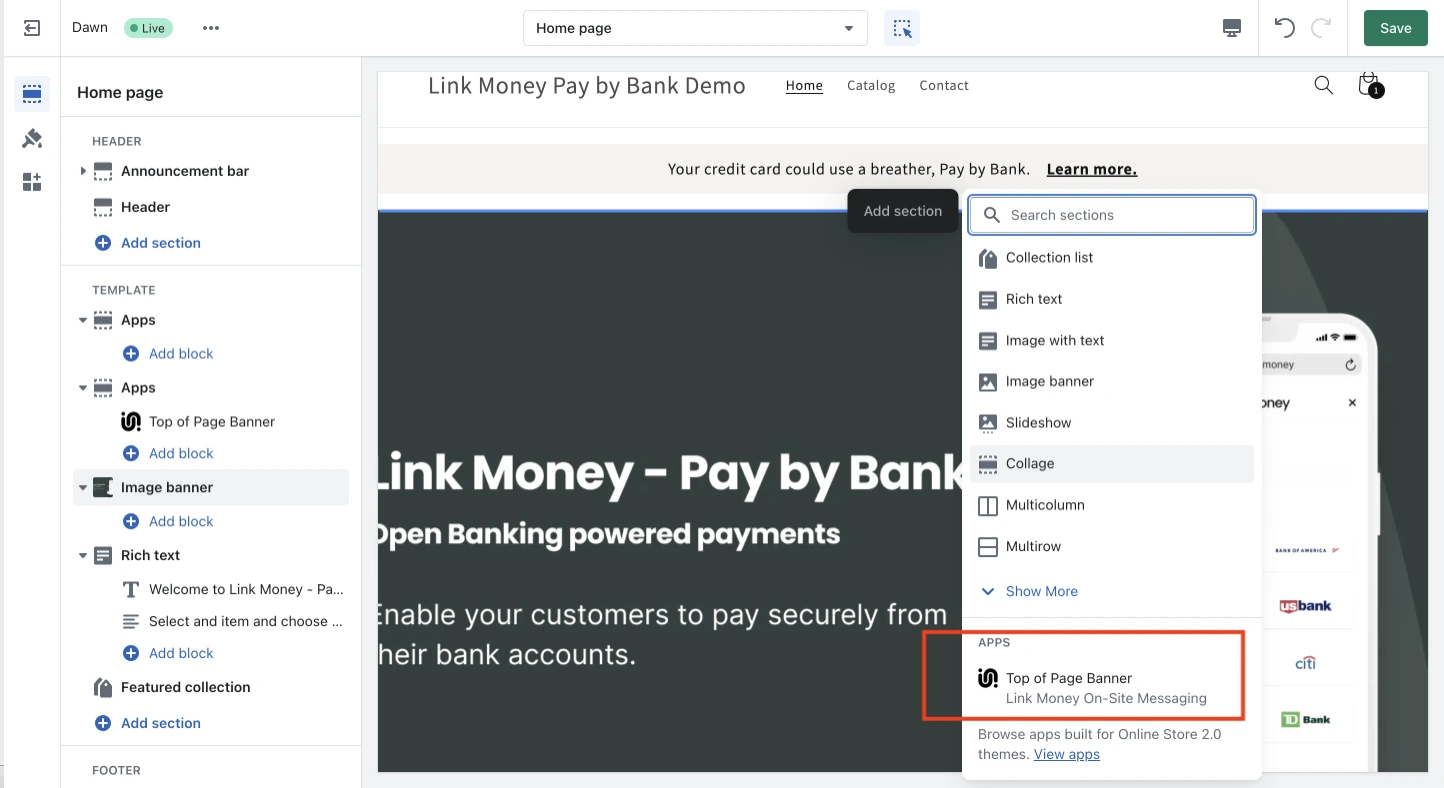
4. Once clicked, a drop down will show. At the bottom of this drop down you will be able to see the supported ads Link On-Site Messaging provides for this section. Select your preferred ad.
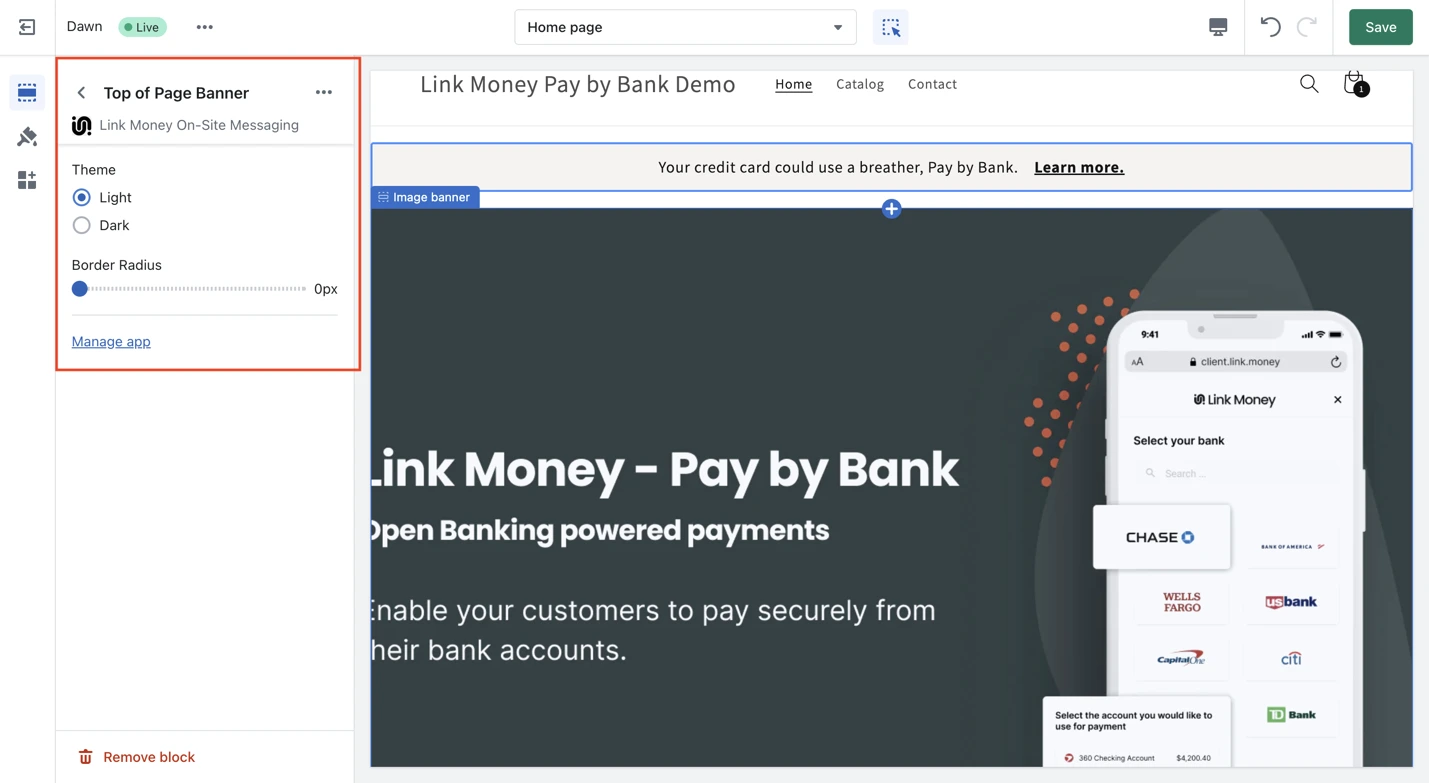
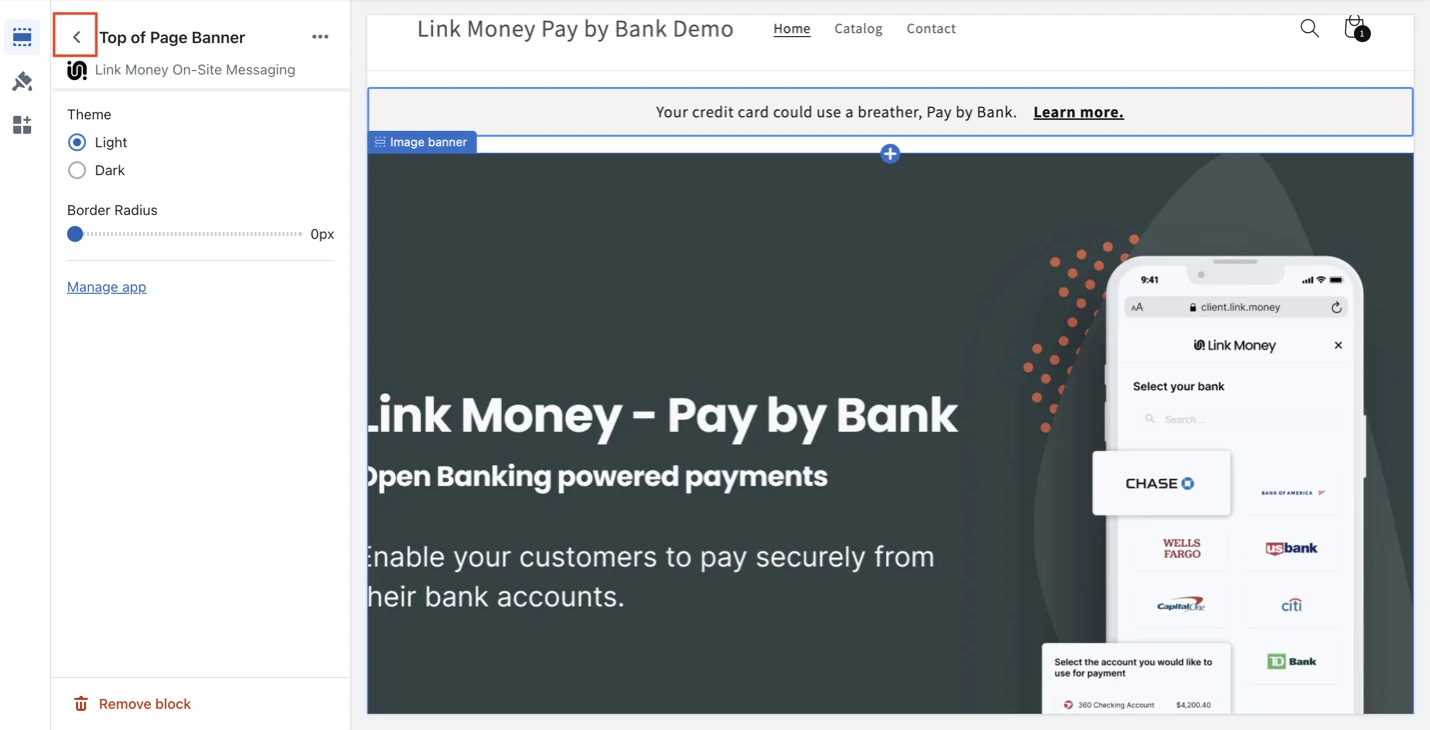
5. After selecting an ad you will be able to make certain customizations such as adjusting the theme between light and dark, and also adjusting the border radius of the ad to fit better with your store’s look and feel.
6. Margins can also be adjusted if desired by clicking back on the block’s page, finding the block on the Nav bar and clicking on “App” above it, then changing the selection on the “make margins same as the theme” checkbox.
Back button

Find the block on the nav bar and click on app
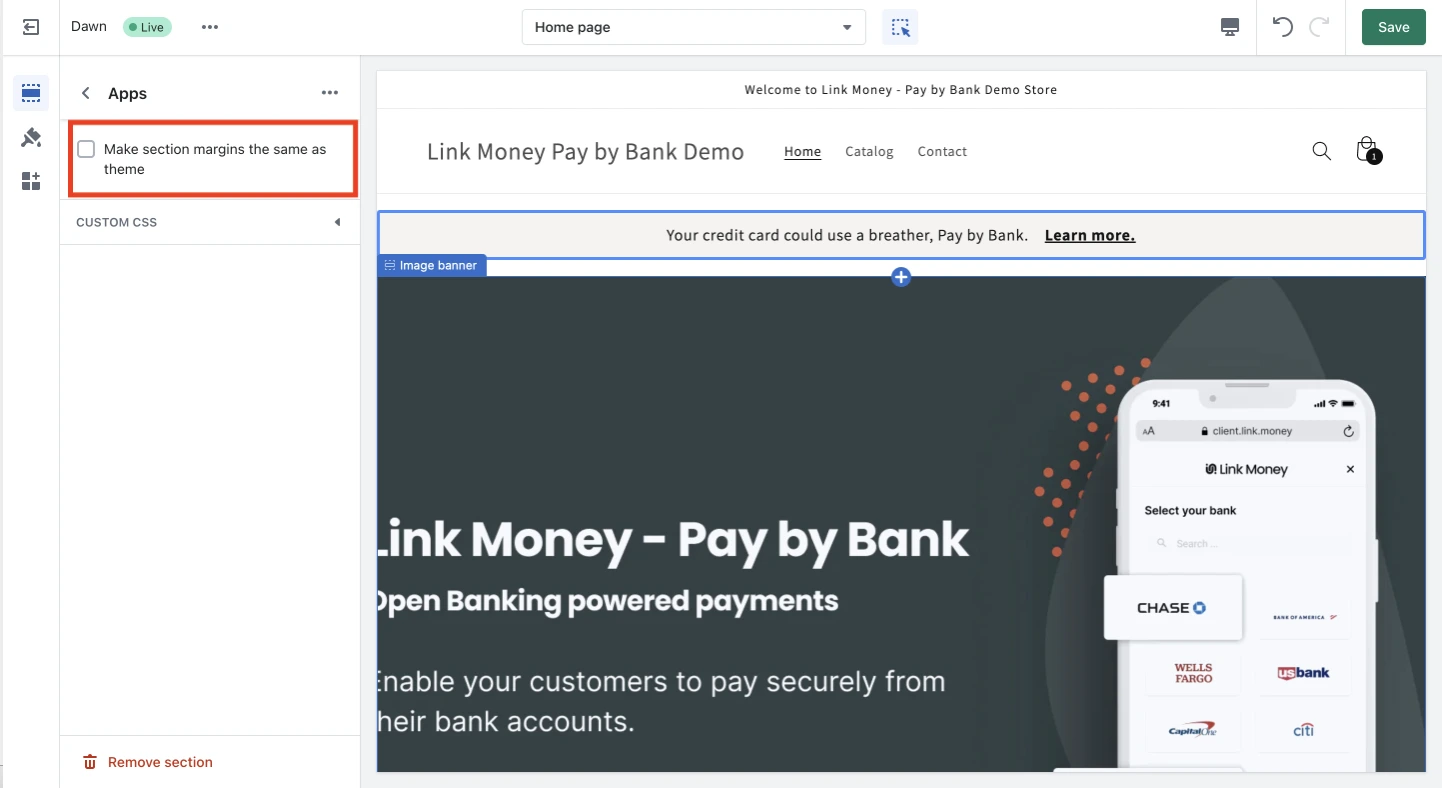
Make margins same as theme checkbox
7. Once finished customizing the ad click on “Save” in the top right corner to enable it on your store.